
CSV import is the right setup path when you already have transaction history in another app, spreadsheet, or bank export. If you are starting fresh, create your accounts first and use CSV import only for the history you actually want to keep.
MoneyCoach can import CSV files even when the column order is different, because you can map the fields during the import flow.
Download MoneyCoach CSV SampleYou can open a CSV from Files, iCloud Drive, Mail, Dropbox, Google Drive, or any other document provider available on your device.
If you want to import Apple Card statements, use the dedicated Apple Card option inside Settings > Import & Export instead of the general CSV flow. We have a separate guide for that here.
TL;DR
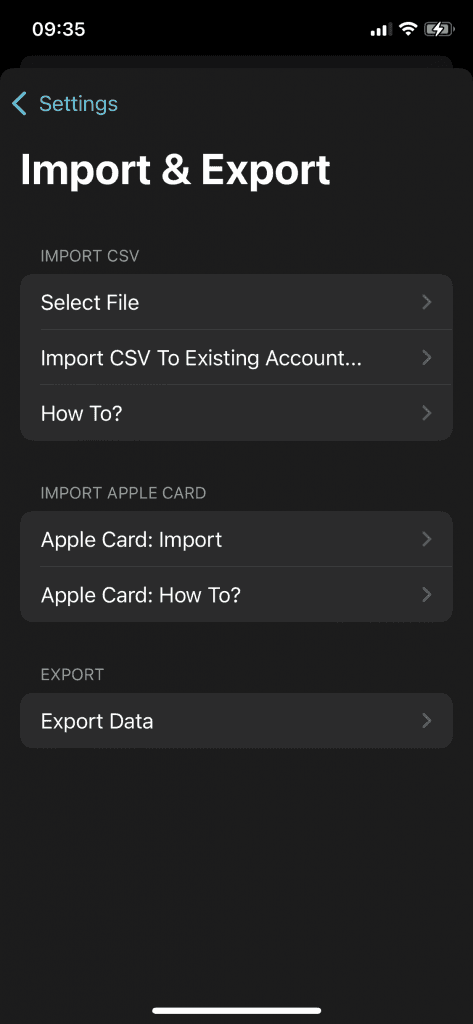
- Open Settings > Import & Export and use Import CSV or Import to Account.
- Map required fields carefully, especially amount, date, type, and account.
- For transfers, import matching Expense + Income rows with the same date/amount and localized transfer categories.
- Keep default localized Transfer Expense and Transfer Income category names unchanged.
Step-by-step guide
- Open Settings in MoneyCoach.
- Go to Import & Export.
- In the Import CSV section, choose the import action that matches your goal:
- Import CSV if you want to map and import a file into MoneyCoach.
- Import to Account if you want the imported rows to go into a specific existing account.
- Select your file from the system file picker.
- Review the detected columns and map them to the correct MoneyCoach fields.
- Double-check the important fields before importing:
- amount
- date
- transaction type
- account
- category and subcategory, if your file contains them
- If a field does not exist in your file, leave it unmapped instead of forcing a wrong match.
- Start the import and let MoneyCoach finish processing the file.
- Review the imported transactions and correct any field mapping only if something looks off.
If you import files from the same source regularly, MoneyCoach can reuse what it learned from earlier mappings, which makes repeat imports much faster.
About Transfers
MoneyCoach represents a transfer as two linked movements:
- one expense from the source account
- one income into the destination account
So if your CSV contains transfers, the cleanest import is a pair of matching rows with the same date and amount, one on each side of the transfer.
To successfully import a transfer from CSV, include two rows that match this structure:
- same date
- same amount
- same transfer category (localized transfer category)
- different accounts
- different types:
- one Expense row (this is the sender/source account)
- one Income row (this is the receiver/destination account)
For transfer detection to work correctly, your app must keep the default transfer categories:
- one Transfer Expense category
- one Transfer Income category
These category names are localized to your app language by default, and they are created automatically. Do not rename these transfer categories. Renaming them can break transfer matching and cause imported transfers to be treated as regular income/expense entries.
Common mistakes
- Mapping the wrong column to Transaction Type or leaving it ambiguous.
- Importing transfer rows that do not match on date/amount/category.
- Using renamed or custom transfer categories instead of the default localized transfer categories.
- Forcing mappings for missing fields instead of leaving them unmapped.
Additional Notes
- If your file does not contain a dedicated transaction type column, use the amount sign to separate income and expense whenever the importer offers that option.
- If your bank export uses different date formats, fix the mapping before you import everything.
- If your file contains optional values such as description, tags, payee, currency, or subcategory, map them. If not, skip them.
- If the first import result looks wrong, stop and adjust the mapping before importing a large history.
If you are preparing a file manually, the simplest format is one amount column, one date column, and one row per transaction. You can also use the attached CSV sample as a template to create a properly formatted CSV file you can then import to MoneyCoach.